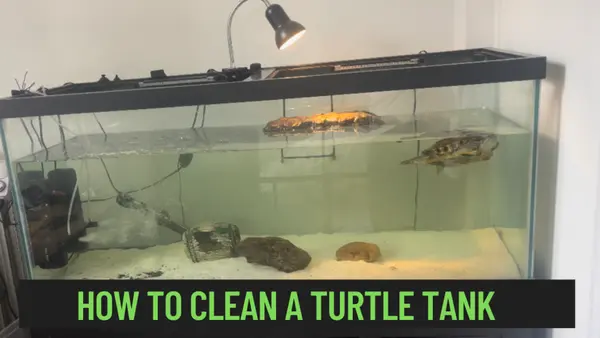
An indoor box-turtle enclosure needs generous floor space, diggable substrate, warm and cool areas, appropriate UVB lighting, sheltered humid retreats and shallow water the turtle can enter and leave easily. A small aquarium with a basking dock does not meet the same needs as a land enclosure.
This guide focuses on an adult Eastern box turtle, Terrapene carolina carolina, living indoors. Identify your turtle first: ornate and other North American box turtles need their own care plan, and Asian box turtles such as Cuora should not be housed by following this guide automatically. Hatchlings also need a separate plan.
I’m TurtleHolic, and I’ve used a rock-style hide for my own box turtle. The useful part of a hide is the shelter it offers—not the brand or how impressive it looks. Below, I’ll walk through the decisions that matter before adding decorative pieces.
Start with floor space, not a gallon label
Measure the adult turtle’s expected straight shell length, then lay out the enclosure footprint on the floor. A tall tank can look large while offering little room to walk, dig and choose between different conditions.
Veterinarian Catherine Love’s box-turtle housing guide uses an enclosure length of 10 times the animal’s length, a width of five times, and a height of three times. Applied directly, a six-inch adult gives 60 × 30 × 18 inches; an eight-inch adult gives 80 × 40 × 24 inches. These are planning dimensions, not a reason to stop at the smallest possible enclosure. Larger usable space is preferable.
The finished wall height must still prevent escape after substrate and furnishings are added. Measure from the highest climbable surface, not just the bare enclosure floor. If you have children or other pets, plan a secure, ventilated cover as part of the design.
Choose an enclosure you can maintain
A purpose-built table or large tub can give you more control over the footprint than a standard aquarium. Before buying or building, check the inside dimensions, moisture resistance, access for cleaning and the space needed above it for lamps. A wooden build needs a suitable sealed interior; follow the coating maker’s curing and animal-use guidance before occupancy.
Draw the water dish, two retreats and the warm area to scale. If they leave no clear walking route, increase the footprint or simplify the furnishings. An attractive photograph is not enough to judge whether an enclosure is spacious or correctly heated.
What to have ready
- A secure land enclosure with room to move between warmer and cooler areas.
- A suitable overhead heat source, rated fixture and compatible temperature control.
- A reptile UVB lamp and fixture chosen for the actual mounting distance, plus a timer.
- Digital thermometers for the warm and cool areas, a way to measure the basking surface, and a hygrometer.
- Burrowing substrate, shelters, a shallow stable water dish and a washable feeding surface.
- Dedicated cleaning tools and a record of your readings.
Put function first. A hide you can lift to check underneath and a water dish you can remove without dismantling the enclosure will make daily care easier.
Arrange the habitat in three useful zones
| Zone | Purpose | What to check |
|---|---|---|
| Warm, lit area | A place to bask with nearby cover and access to the rest of the enclosure | Surface and air temperatures; lamp distance; no contact with hot equipment |
| Cooler retreat | Shade, shelter and a humid microclimate | Conditions inside the retreat as well as in the open enclosure |
| Water and walking space | Easy access to drinking and soaking water, food and routes between shelters | Stable footing, an easy exit, no trapping gaps or climbable route out |
Do not squeeze every feature directly beneath the lamp. You want the turtle to be able to choose where it spends time, and you need to be able to reach every corner to inspect and clean it.
Measure heat and install UVB correctly
For a practical starting reference, Catherine Love’s veterinary guide gives a basking surface of 85–90°F, warm-side air of 80–85°F and cool-side air of 75–80°F for box turtles. Measure those locations separately. They are different readings, not three names for one thermostat setting. Confirm the targets for your individual turtle with a reptile veterinarian, particularly if it is young, unwell or has a seasonal care plan.
Start the equipment before moving the turtle in. Record readings after the lamps have warmed the enclosure and again later in the day. If the cool end becomes too warm, increasing lamp power will not fix the layout; you need to adjust the heat source or give the animal more separation from it.
UVB and heat are separate requirements. Use the manufacturer’s guidance for the exact lamp, reflector, distance and mesh arrangement. A lamp’s percentage or wattage alone does not tell you what reaches the turtle. Ordinary window glass is not a substitute for appropriate UVB provision. VCA’s veterinary housing guidance explains why lighting and temperature control matter.
Secure the fixture, keep cords away from water and chewing or climbing access, and keep the turtle from touching hot surfaces. Follow the lamp instructions for replacement. For more on choosing heat equipment, see how to choose basking-light wattage; use your box turtle’s targets rather than copying an aquatic turtle’s setup.
Provide room to dig and a humid retreat
Use a moisture-retaining, burrowable substrate appropriate for box turtles, rather than a bare decorative floor. Phoenix Herpetological Society suggests a mix of organic topsoil, coconut coir and leaf litter, with multiple sheltered areas and humid retreats. Its care guide lists 60–80% average humidity. These are reference conditions to monitor, not a reason to keep the entire enclosure waterlogged. Read its box-turtle care guidance.
Check the ingredients of soil and bedding before purchase; avoid pesticide- or fertilizer-treated material. VCA specifically cautions against cedar shavings and emphasizes safe, clean bedding. Use your hygrometer to learn how quickly your particular enclosure dries rather than adding the same amount of water regardless of the reading.
Inspect beneath hides and around the water dish when you spot-clean. If one corner stays foul or saturated, fix the spill, drainage or ventilation problem. Adding more dry material on top only hides it.
Make water and shelter easy to use
Provide a shallow water dish large enough for the turtle to sit in, with a stable, easy entrance and exit. The turtle must be able to hold its head above the water comfortably; a fixed depth described as “a few inches” will not suit every animal. VCA recommends changing the water daily and cleaning the container, sooner if it becomes dirty. Source: VCA.
Watch the turtle use the dish when it first moves in. If it slips, struggles to climb out or cannot turn around comfortably, change the dish rather than assuming it will learn to cope.
Add shelters with entrances wide enough for the animal, and stable cover that cannot collapse. Check plant species and pesticide history before putting living plants within reach. Leave room around each feature so the turtle can turn and you can clean. I would rather have a simple, usable layout than a crowded one with nowhere to walk.
Species and age change the plan
The Eastern box turtle is the example here. If yours is a Gulf Coast, three-toed or ornate box turtle, confirm its adult size, moisture needs and seasonal care before copying the measurements. A shared common name does not make all housing instructions interchangeable.
What about a baby box turtle?
Do not simply shrink this adult layout. A hatchling needs particularly accessible water, cover and closely monitored conditions. Get a hatchling-specific plan from the rescue, breeder and reptile vet before setting up. Keep track of growth so temporary housing does not quietly become permanent.
Check the enclosure before moving your turtle in
Run the equipment through a normal day and night and write down the temperatures and humidity. Check the water exit, lamp security, hiding places and every possible climbing route. Once the turtle moves in, watch how it uses the space and keep a daily note of appetite and activity. A change in health needs veterinary attention, not just another piece of equipment.
If your climate and circumstances allow secure outdoor housing, compare this plan with our outdoor box-turtle enclosure guide. For budgeting, use the turtle ownership cost worksheet before ordering the enclosure.